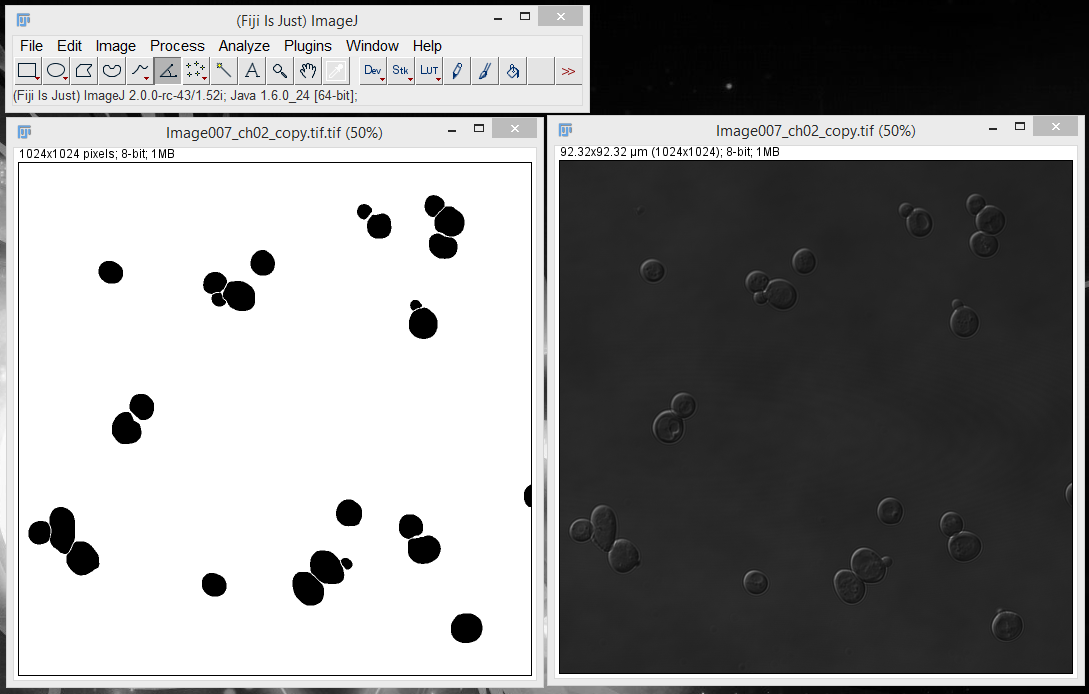
Want to load the results of your YeastSpotter segmentation into ImageJ for subsequent analysis? Just follow these steps:
1. Download the ImageJ Compatible segmentation from the results page
Your results page will give you the option to download a standard segmentation file (intended for upload
into custom Python/R/Matlab scripts), and a ImageJ compatible segmentation file. You want the second option,
which is specifically customized to work with ImageJ's Analyze Particles tool. Note that due to the file
convention, the ImageJ format is slightly less precise in assigning the pixels bordering cells. We expect
this difference to affect highly clustered and smaller cells more. If precision is important to your
analysis, we recommend building a custom script in your coding language of choice.
2. Open both the image you want to measure and your downloaded segmentation file in ImageJ.

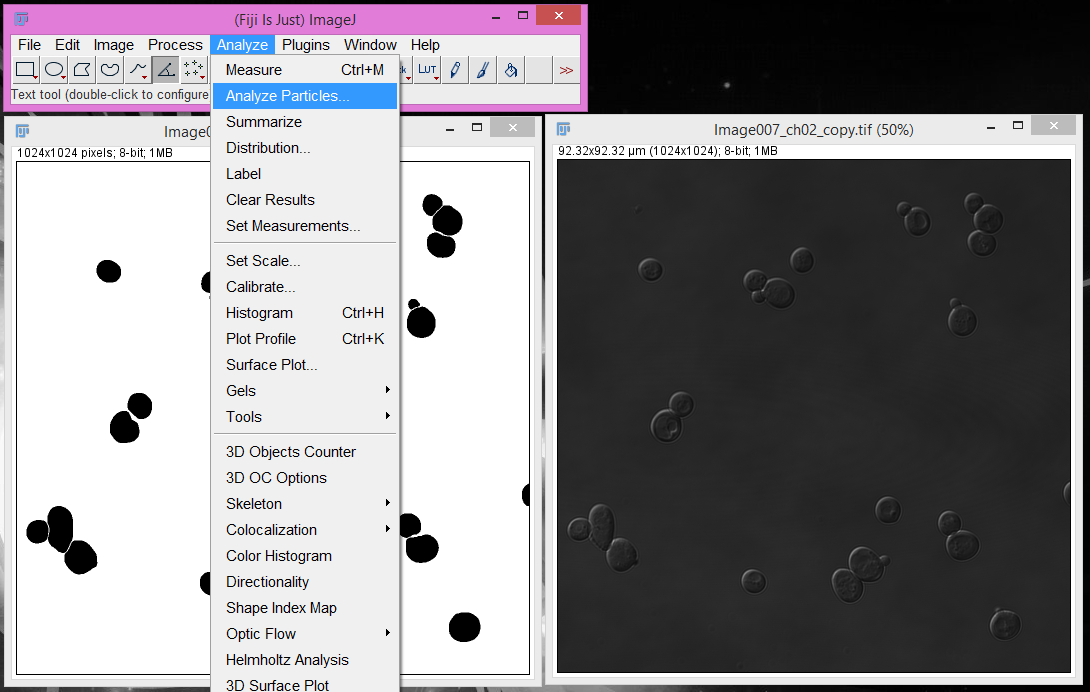
3. Select the segmentation image and click Analyze > Analyze Particles.

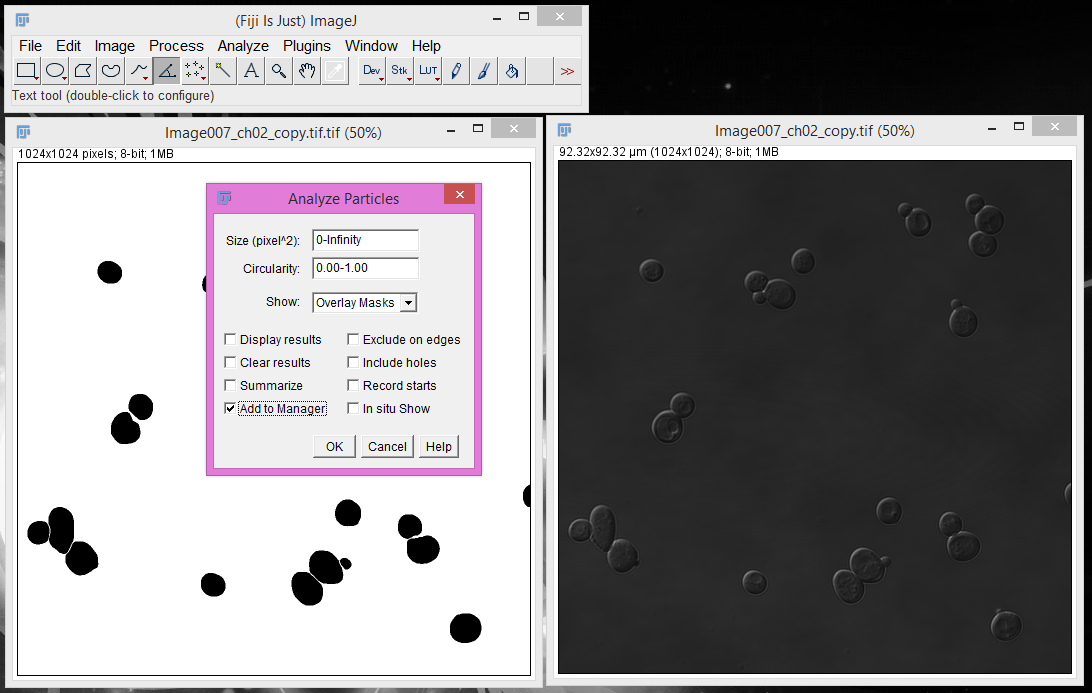
4. Select the "Add to Manager" option and click "OK".

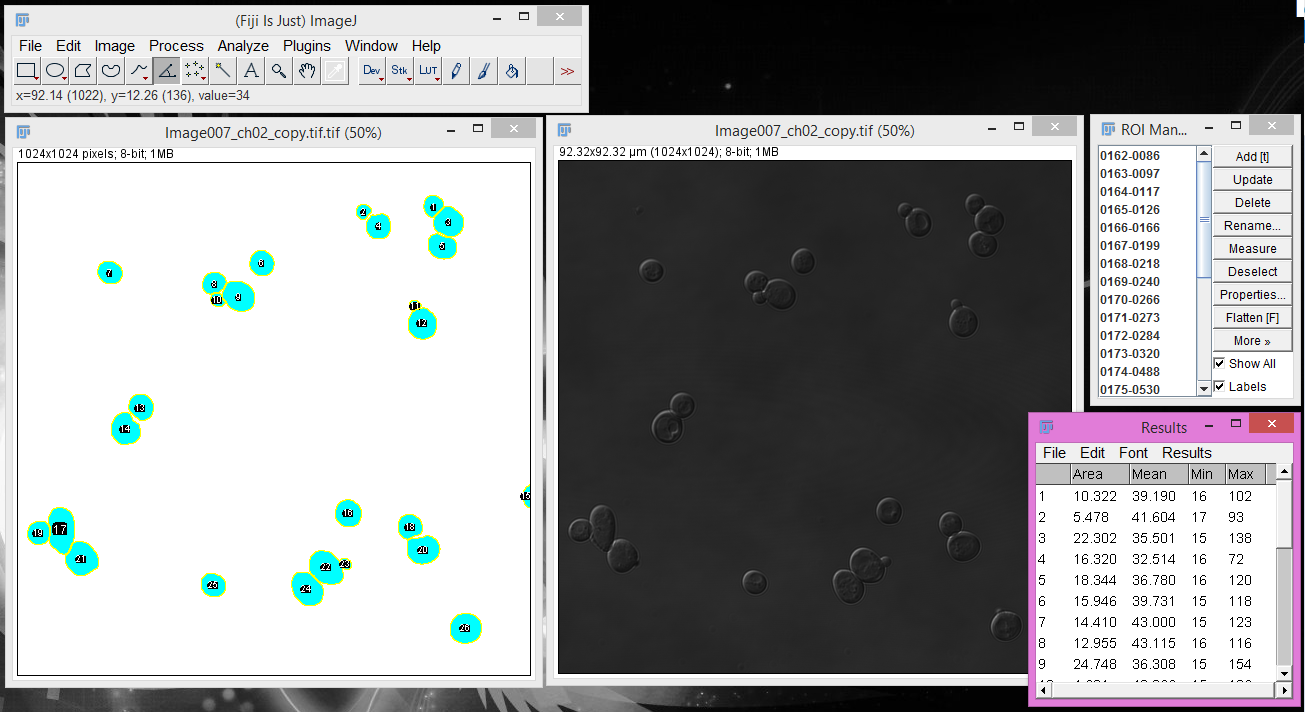
5. Confirm your cells in the ROI Manager pop up.
The "Add to Manager" option will cause a pop-up window that contains each individual object (cell)
as an ROI.

5. Select the image you want to measure and extract measurements for the ROIs.
Click on the image you want to measure and then click "Measure" in the ROI Manager. This will
produce a pop-up window of summary statistics for each individual cell in your image, such as the
area of the cell or the mean intensity. If you want to customize these measurements,
this can be done under the Analyze > Set Measurements option. If you want to save these measurements,
this can be done under File > Save As in the measurements results panel.
